Welcome to my new Business blog
My First Blog Post
Be yourself; Everyone else is already taken. — Oscar Wilde. This is the first post on my new blog. I’m just getting this new blog going, so stay tuned for more. Subscribe below to get notified when I post new updates.
Introduce Yourself (Example Post)
This is an example post, originally published as part of Blogging University. Enroll in one of our ten programs, and start your blog right. You’re going to publish a post today. Don’t worry about how your blog looks. Don’t worry if you haven’t given it a name yet, or you’re feeling overwhelmed. Just click the…
Follow My Blog
Get new content delivered directly to your inbox.


I saved the image as a PSD file and as JPEG in order to upload it to the blog , as well as resizing it to medium to upload.
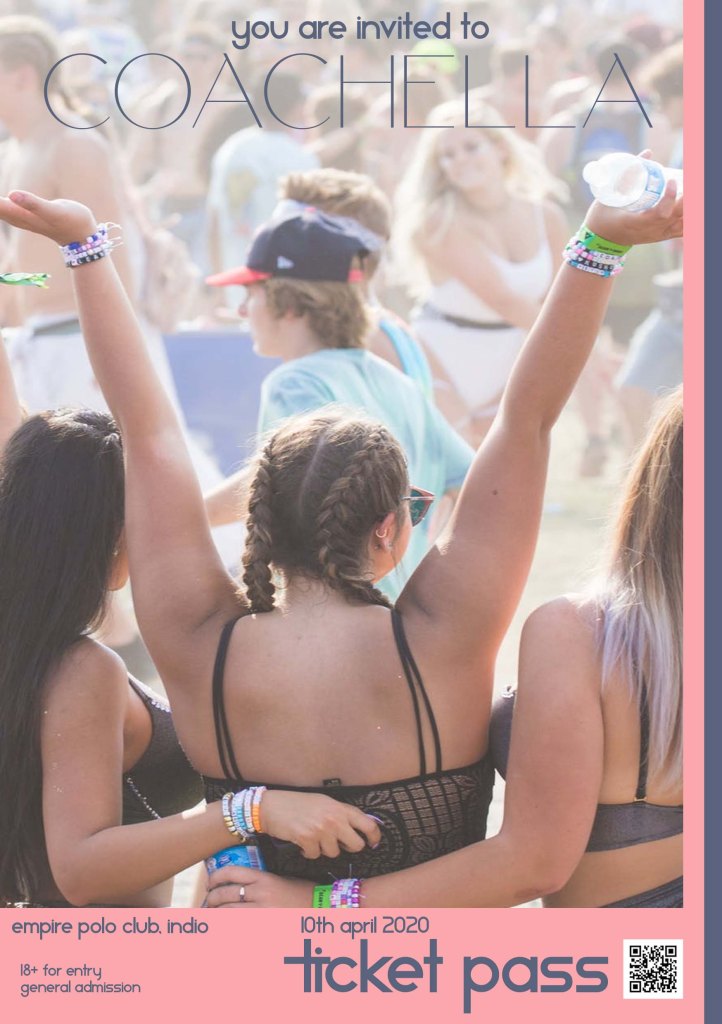
I used adobe photoshop to create the ticket design, with a page size of A5 and a resolution of 300. The orientation was landscape.
I used copy and paste to move the image from my poster to the ticket pass and resized it using Ctrl T to fit. Copy and paste was used to move the text from the poster onto my ticket pass, which I then used the box above layers to change the font,colour and size. I did not use any text effects, and I copied and pasted the QR code from google. The image was saved as a PSD file and as a JPEG so I could upload it to my blog and resize the image to medium to upload it.

I used adobe photoshop as my software to create the front of my postcard and the size was A6, with resolution 300 and orientation of landscape. The image was copied and pasted from the ticket pass to the post card and then I resized it using Ctrl T making it fit. I used copy and paste from the text on the ticket pass moving it to my postcard and used the box above layers that allowed me to change the font,colour and size. I didn’t use any effects and saved the image as a PSD file and as a JPEG in order to upload it to the blog, the image was resized to medium to be uploaded.
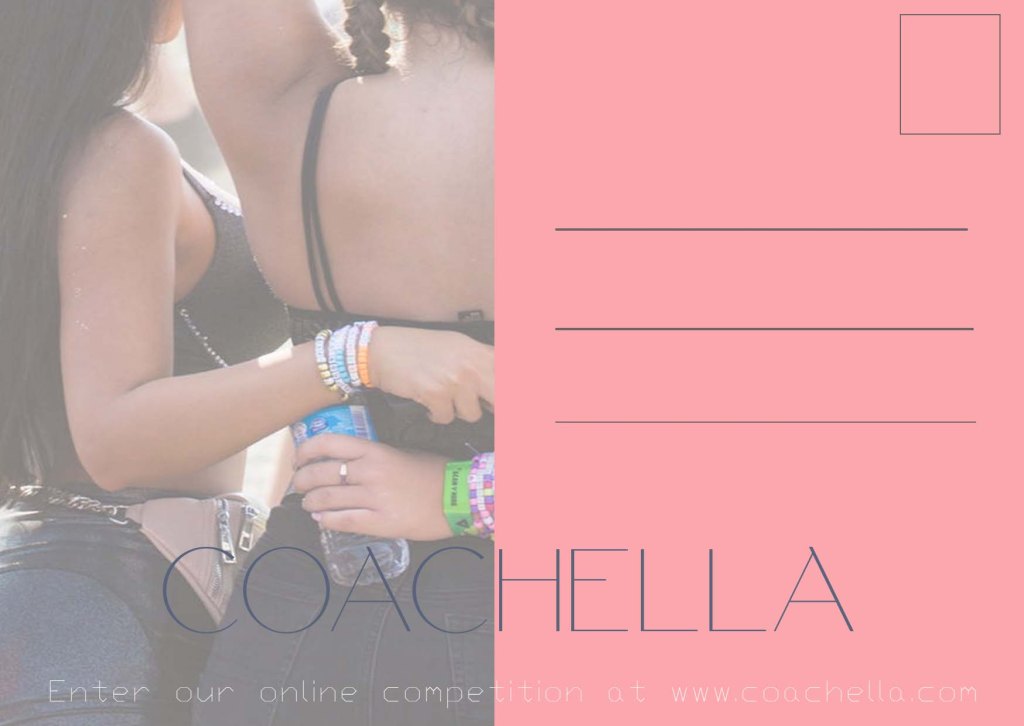
I used adobe photoshop for software to create the back of the postcard, with the size being A6, the resolution 300 and the orientation of landscape. I used the line tool to create the lines on the back and the postcard stamp box was created by using the box feature in photoshop. I used the box above layers that allowed me to change font, colour and size. I created the special discount text by using a text box and typing it and then changing the colour to maintain the same theme as the poster and ticket.
saved the image as a PSD file and as a JPEG in order to upload it to the blog, the image was resized to medium to be uploaded.
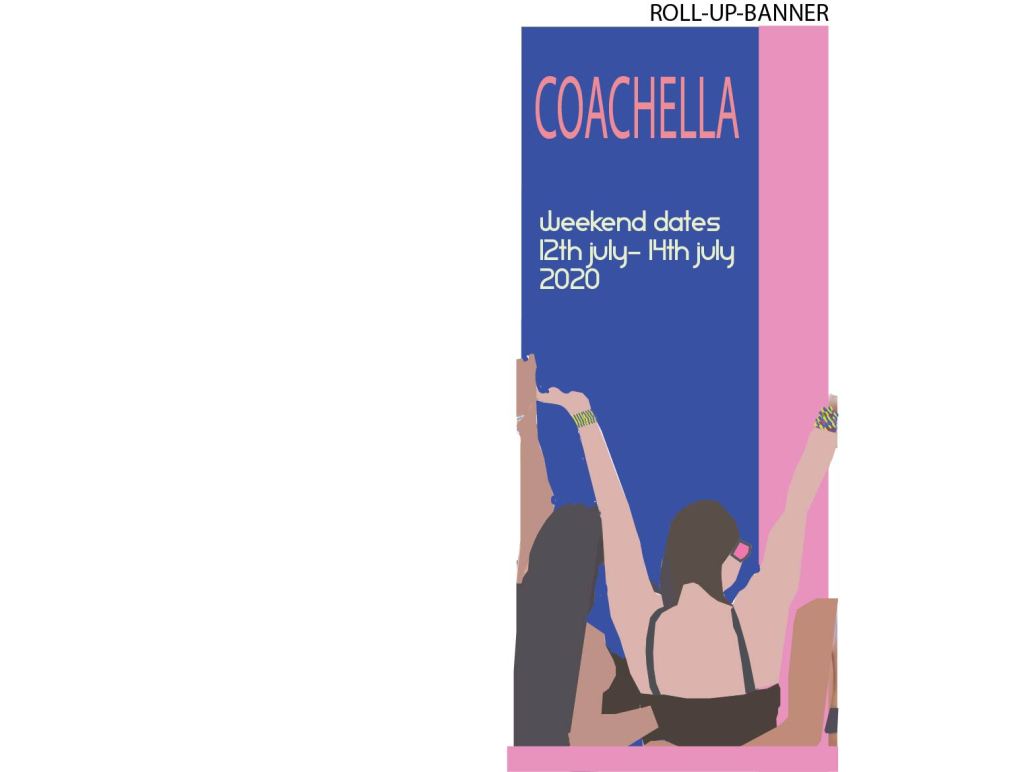
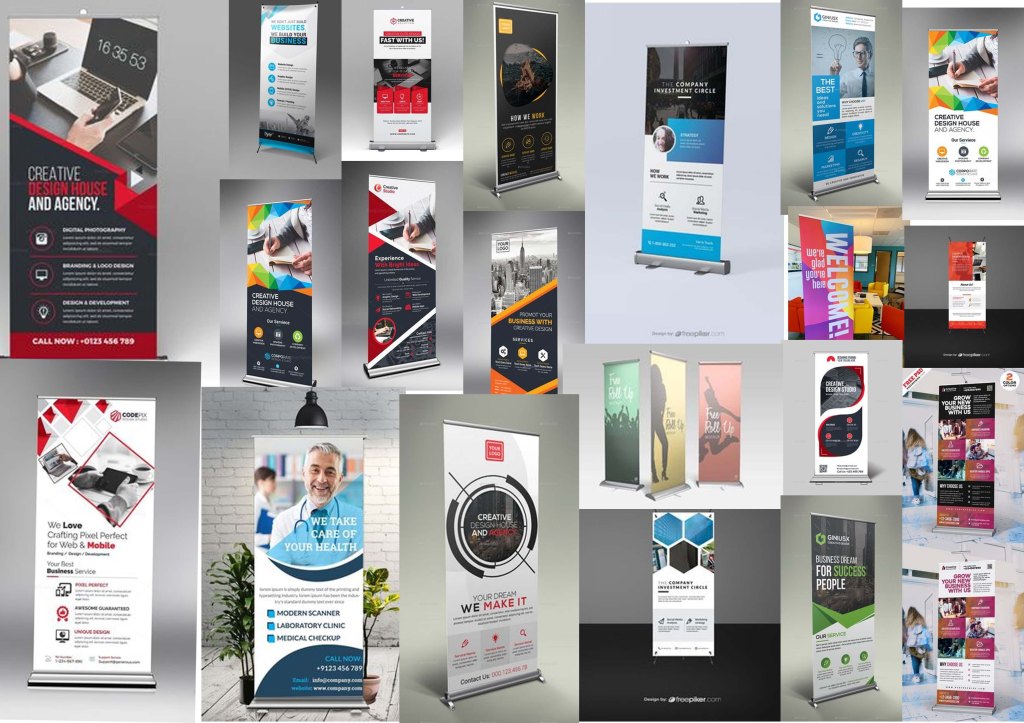
I used adobe illustrator to create my ROLL-UP Banner. For the page size I downloaded the template from mycity with the correct proportions and page size.
My image was captured from pexel which offers royalty free images. I copied my image over from my poster on photoshop. I did not make use of any layers.
I used the pen tool, the eye dropped tool, the selection tool, the gradient tool and the direct selection tool. In the character box under appearance box it gave me the option to change font size and text. The appearance box let me change colour by using the fill option and then selecting a colour. I saved it as an ai file then exported it as jpeg which allowed me to upload to the blog.
in order to create my image.
